Showing posts with label MYOG. Show all posts

Tuesday, January 14, 2014

Remolding the Toes of Intuition Liners


I've been skiing my Scapra Maestrale boots with the wrap liner from  my old Scapra Spirit 4s when I want a bit of extra stiffness. The Maestrale liner has a flexible soft ankle region which helps them tour well but doesn't give the boot shell a ton of support. When skiing cut up variable snow with the stock liners the Maestrale can collapse forward from lower shell deformation.

My Spirit liner is a bit stiffer and higher and takes up more volume in the ankle of the shell despite being from a smaller shell sized boot (26.5/27 vs 27.5/28). I have wide feet and my spirits were quite tight lengthwise (too tight for long tours) but snug side to side. The larger Maestrale is around the same width but has more toe room. I decided to remold the front of the liners to give my toes some more wiggle room and better fit the front of the Maestrales.

The process is similar to molding an Intuition for the fist time (see here and here) and should also work if you just need to make more space in the toes (or anywhere else) without remolding a liner.

The basic supplies you need are:

  • Heat Gun 
  • Toe caps or padding for the spot you need more space. I used the toes from some old socks and some neoprene bike shoe toe covers I found for cheap but you can get the real thing from Intuition. If you are just heating the toe you can also wear multiple pairs of socks. If you're molding more then just the toe make sure the padding doesn't go too far back or you'll loosen up spots you want to be snug. 
  • Ski socks.
  • Your insoles.
  • A book or bit of 2x4 to stand on.
  • A bit of wood or cardboard to work on so you don't accidentally melt your workspace. 

You might also consider using tin foil to shield areas you don't want heated.

Prepare your workspace with a chair to sit on while putting the liner in the shell and some entertainment and a cold drink to enjoy while you wait for the liner to cool on your foot.

First pad the areas of your foot where you need more space and put your foot bed on under your sock:

This padding goes too far down my foot but i'm only heating the toes. If I was molding the whole boot I'd cut the toe cap shorter.

Sock goes over this contraption.

Getting the hot liner with your foot in it without any creases or folds is the most tricky part and you may want to practice before you start cooking. If you are heating a large area or the whole boot you may want to use a couple tricks:

  • Tape the inside back of the shell with smooth packing tape to produce a smooth surface you can easily slide the liner in on.
  • Have 2 thin plastic grocery store shopping bags and some silicone lubricant spray handy. When the liner is hot put a bag over it and spray with lubricant. The bag covered liner should slide right into the shell.


Also make sure the shells have the micro adjust buckles adjusted how you want them before you start. Loose buckles during molding will yield a tighter end product and tighter buckles a looser one.

When you're ready to cook, carefully and slowly heat the toe with the heat gun until it is warm and squishy throughout. I started with the gun set quite cool but ended up using a temperature setting around 500 degrees. Keep the gun moving and bring the temperature up slowly. I tried to get some hot air into the inside of the toe but mostly heated the outside. Be careful not to get areas you don't want to remold too warm.


Once the liner is hot and squishy put your sock clad foot in it and insert the whole mess into the boot like you practiced. Once your foot is in do up the buckles put the boots in ski mode, give the heel of the boot a kick against the floor and then flex the boots forward to make sure your foot is in the right place. Stand with the toe of the boot on a book or bit of 2x4 while it cools. This last part is intended to form a heal pocket and is less crucial if you're only remolding the toes though you still need to get your foot in the right place somehow.


I started working on the second liner while standing there waiting for the first to cool which worked well. In the end you want to let each liner cool for at least 15 minutes.


I haven't had a chance to ski these since I remolded them but the end result seems good, plenty of room to wiggle my toes but still a firm hold on the rest of my foot and lower leg.

Thursday, October 31, 2013

Adding Rocker to my Rock Skis (a TR and How To)


So I added some rocker to my old Black Diamond Voodoo skis on Sunday as I waited for the first arctic blast of the season. The process was surprisingly easy and seems to have went well though only time will tell if the shape holds or if the tips break off.

The Rationale


Digging trenches with the Voodoos in Cascades Concrete.

At 88 underfoot with minimal tip and tail rise, the Voodoos are fun in powder but distinctly not in heavy or crusty snow where the tips tend submarine. Even with the vertical din on my Dynafit ST bindings set to 9 I've released out of them just by getting them stuck in a wet snow bank. In heavy slop they tend to want to stay stuck and go straight more than turn. 

Justice vs Voodoo before the Mod.
I haven't really skied them much since I got my much fatter, rockerd Black Diamond Carbon Justices which are a great ski for backcountry descents in the Cascades or here in the Northern Rockies. They surf over soft snow be it mid winter powder or spring slop. Part of this is their 111 underfoot width and part of it is their modern rockered shape. In cut up refrozen and remelted Cascades styrofoam snow you can just tilt them on edge and ride the rocker around in big turns. 

The Justices can be a bit much on the up though. At 8 lbs for my 175s they are only 3/4 of a pound per pair heavier then the Voodoos but wider skins and more snow on top add weight. A bigger issue is the increased effort to side hill on firm snow while skinning. This all adds up when you're trying to pull off a long day of powder skiing.

After the Mod
This has lead me to wonder about skis with a modern soft snow geometry in a skinnier package. There are actually a few of these out there with the Black Diamond Current being the most intriguingly modern powder ski shaped I've seen and coming in around 6 lbs in 175 for the new 2013/14 model (last years is heavier). The La Sportiva GTR, Dynafit Cho Oyu and G3 Zenoxide C 88 also offer a bit of rocker and impressively light weights but look to be a bit more hard pack focused which is not what I want.

None of these skis are cheap so I decided to see if I could make my Voodoos into something even more powder focused and give them a test in the full on blower powder on rocks conditions our early season snow pack is sure to entail. Whats more, I can add as much rocker as I want and see if I can come up with a true skinny soft snow ski instead of trying to balance hard snow performance which I really don't particularly need. I think backcountry ski manufacturers are too often held hostage to the fact that their skis will be reviewed and demoed on groomers at events like Outdoor Retailer. The vast majority of my skiing is on soft snow and I'm willing to have to pick and sideslip my way down scraped out egress trails if it means I can surf over slop and breakable crust.

The Supplies


  • Bit of closet rod or wide dowel.
  • Heat Gun Capable of reaching around 1000 Degrees F

The Process


The First Bend

The Second Bend
Here is the process I used. I think this would differ widely for different types of ski material but this seems to have worked well for my wood and fiberglass Voodoos. I also would only do this with skis you don't mind risking total destruction as there is a possibility of weakening the ski or causing delamination. 
  1. Rig up the ski as shown, include a Voile strap between the bindings to hold the camber flat. You may want to make a few bends to get an even rocker, start near the tip and work back.
  2. Set up a work station with a chair on either side of the skis and grab some entertainment. I watched Futuama on netflix on my phone. The time remaining counter doubles as a timer which is nice.
  3. Turn the heat gun on and let it warm up. I set mine to the max around 1100 F and slow air flow.
  4. Heat each side of the ski for 5 minutes keeping the gun moving and being careful to avoid the voile strap. Be precise and watch the time (this is where the Futurama comes in) to keep things even. At first I tried switching back and forth every two minutes but I think doing each ski for a full five minutes at once works better. You only need to get the inside of the skis to around 200 degrees so keep the air moving. I got some top sheet bubbles but I think that is fine.
  5. Allow the skis to cool for at least an hour before removing the forms.
  6. Remove the forms, inspect and repeat steps 1-5 for any additional bends needed. If the skis get uneven, repeat the steps but only heat the less bent side (maybe for less time depending on how uneven the skis are). I made 4 bends plus one bend to only one ski to even things out. If you need to make a bend further up towards the tip than one of your existing bends, loosen the strap around the bindings to release the camber so that you aren't flattening your existing bends at the same time.
  7. Rig up the clamp and dowel to be outside your widest bend so that all the beds are under tension and leave the skis overnight. I plan on letting them sit for a while longer before testing them to make sure the epoxy has reset and because we still need more snow.

The Results


I'll do a follow up once I've had a chance to ski them and see if the shape change lasts but the difference is visibly noticeable and i'm excited to try them. I'm debating adding a bit of tail rocker though the twin tip on the Voodoo already works a bit like that. After I have a chance to ski them I may also add more rocker to the front either pushing further back towards the binding or adding more curve towards the tips.

Before
After
Oh yeah
Soon

Tuesday, July 23, 2013

Make your own stream crossing sandals


I hate wet feet.  Enduring sloppy, soggy shoes while hiking can make an otherwise enjoyable hike a slog to be endured.  Wearing a pair of sandals for crossing streams helps keep my feet drier and protects them from sharp rocks and sticks - not absolutely necessary but very nice.  Here's how to make your own lightweight stream crossing sandals.


What you need

  • A sheet of vibram - we used a  10mm Vibram 8870 Newflex rubber soling sheet.  This rubber is light, durable and had pretty good traction on slippery rocks.  The 10mm thickness gives my foot a little more protection than a thinner sheet would and I could conceivably hike in them.  Looks like Vibram 6mm 7175 "cherry" soling would also work, it is supposed to be good and sticky.
  • Narrow gauge webbing - about 6 feet per pair of sandals
  • Box cutter (aka utility knife) with a sharp blade
  • Scissors
  • Lighter
  • Needle nose pliers
  • Pencil (a flat Carpenter's Pencil which makes a strong line is nice if you have one) 
  • A board or something to cut on
  • Your feet
  • Good lighting


The tools I used: a cutting board, box cutter, lighter, scissors and needle nosed pliers.  I did not use the screw driver, but it might come in handy for pushing webbing through the slits in the sole.

Step 1: Trace your feet

There are two ways to do this: trace your feet directly on the vibram or make a pattern on paper first.  I traced my feet directly on the vibram for simplicity.

Place the square of vibram on a hard, flat surface that is well lit.  Next, place one of your feet on the vibram. Start in a corner or near an edge to maximize your vibram and get multiple pairs of sandals out of one sheet. 

Ryan's foot bed has nice rounded toes that follows the shape of his foot.  Note the extra vibram around his instep.  He is marking the spot for a webbing slit between his toes in this photo.


Trace around your foot, staying quite close to the foot itself.  Round the toes.  Keep a little extra space around your instep (don't trace tight to your foot at the instep) and below/just in front of your ankle bone.  You will be cutting slits in the vibram at your instep and just in front of your ankle bone and a little extra vibram in those areas will keep the slits stronger.  One of Ryan's sandals ripped at the instep slit because he cut the slit too close to the edge - it was easy to fix in the field with a good knife but better to avoid the problem.

I am a person who likes a little bit of toe buffer because I tend to stub my toes on rocks, but adding too much extra at the toes for these sandals will make them unwieldy in fast water.  The key to a manageable toe buffer is placing the slit for webbing in the right spot, not adding a bunch of extra rubber to the front of the sandal.

Step 2: Cut out the footbed

Now place the sheet of vibram on your cutting surface and use the box cutter to cut out the footbed you traced.  I had to press quite hard and gouged my cutting board to cut through the tough vibram.


Step 3: Cut 3 slits for webbing

The webbing straps will hold your foot quite securely if you put the holes for webbing in the right place.  One goes between your toes, one at your instep and one just in front of your ankle bone.

Red arrow points to the toe slit that sits between your big toe and second toe
Blue arrow points toward the ankle slit that sits just below or in front of your ankle bone
Green arrow points to the instep slit that sits at your instep just in front of your heel

First, place your foot on the footbed.  Place a mark with the pencil between your big toe and second toe (see photo above).  The trick is not to place your mark too far forward.  I angled the pencil back and down toward the ball of my foot to make a mark slightly under my foot.  This will keep your foot from sliding too far forward when you are walking.

Place the mark at your instep just in front of your heel at the narrowest part of your foot.  Keep a little space between the edge of the footbed and your mark.  

Place a mark on the outside of your foot at the narrowest spot, about opposite of the mark you made for your instep.  This will be below or just in front of your ankle bone.

Use the box cutter to punch through the vibram and cut slits at all three marks you made on the vibram. The slits should be just a tad longer than your webbing is wide.

Step 4: Thread the webbing

Tie an overhand knot in the end of your webbing.  Make the knot as flat as possible by removing twists in the webbing.  Pull tight.

The overhand knot pulled tight against the vibram sole

Begin by threading the webbing through the slit between your toes.  Start by pushing the needle nose pliers through from the foot side to the sole side.  Grab the free end of the webbing and pull the webbing through until the knot hits the sole.

Pliers punching through from the sole side to the foot side.

Now push the pliers through the footbed at the instep slit, from the sole side to the foot side.  Grab the webbing and pull most of it through, leaving a couple inches of slack between the toe slit and the ankle slit.  Release the webbing from the pliers.  You can slip your foot into the sandal at this point to help with adjusting the strap.


Take the webbing  in your fingers and wrap it up and around the webbing near the ankle slit.  You may wrap it once or more times depending on how high you want the straps the rest on your foot.  I wrapped the webbing twice.

Wrapping the webbing at the ankle slit

Pull the webbing up from under the sole


Wrap the webbing around itself

This is the finish of one wrap.  Wrap around a second time if you would like to the webbing strap to end up higher on your foot.


Time for the last slit.  Push the pliers through the footbed from the sole side to the foot side at the ankle slit. Grab the webbing and thread it through, leaving a little bit of slack.  Release the pliers from the webbing.

Take the webbing in your fingers and wrap it once or twice around the webbing coming straight out of the slit at the instep. 

Step 4: Tie the knot

Your sandal is almost complete.  Next you want to fit your sandal before you cut the webbing to size. Slide your foot into the sandal and adjust the straps to comfortably and snuggly fit around your foot.

Tie the finishing knot before you cut the webbing so you don't cut too short.  My women's size 7 foot ended up with 14 inches of webbing for the strap between the instep and the finishing knot.  It is a little bit long, but gives me extra to tie a good knot.

The finishing knot is a slip knot.  Tie a slip knot around the strap leading from your toe to your ankle.  I tried to write directions for this knot but it got complicated quickly, see photos below for visual directions.

Cross the loose end of webbing over the strap leading from your toe to your instep

Thread the webbing under the toe strap

Cross the webbing over the strap you just made from our ankle to your instep.  Loose end points toward your toes.

Make a loop in the loose end of the webbing.  The one in this photo is a bit large.

Push the loop through the space between the straps at your ankle.

Cinch down and tie tightly


I find that the sandal is most secure when I tie my knot up high on my foot closer to my ankle rather than close to my toes.

Now, very carefully take your lighter and lightly melt both ends of the webbing so that they don't fray.

Congratulations!  You have a new custom fit sandal.  Now, go through the process for your other foot to make a pair.  We got the idea for these sandals from Luna Sandals and the Backpacking Light forum, and of course the original huarache sandal/running shoe from the Tarahumara tribe in Mexico's Copper Canyons.


Thursday, March 7, 2013

Designing the Minimal Packraft

Inflating a design model of a simple packraft. 

One of my main requirements of the packraft design I am working on is that it be quite easy to construct. Alpaka rafts use 10 sections of fabric rolled into cylinders and 21 seams in their tube design. Any seam adds work to a DIY project and this previous attempt to DIY this sort of design has shown that these many curved seams can be difficult to seal. Flat pieces of fabric with seams that are two dimensional enough to be sealed against a table top (as in the Supai design) are easier to deal with.

Knowing a bit of mathematics, I think it is possible to find a design that uses a small number of two dimensional seams to produce a nice three dimensional shape when inflated.


The problem with this sort of design is that curves change and often fold or krinkle as a shape is inflated. Klymit's yet-to-be-released Light Water Dingy, seen in the video above, uses scallops on the the bow and stern to mitigate this. These scallops aren't a great design in terms of how the boat moves thorough the water but allow for very simple construction. My approach is to construct the bow and stern as separate flat pieces that naturally pull into the correct 3d shape when inflated.

Inflated curves behave similarly to these paper models. 
I've calculated that the degree to which circles (and some other conic sections) tighten through inflation can be approximated by assuming the surface of the inflated tube is a cone. I also discovered a wonderful superlight fly fishing tube build in which the author arrived at a similar result by experimenting using models made from Glad Press'n Seal Food Wrap

(He also had better luck with his testing of heat sealable nylon which has convinced me to evaluate some of the more expensive non-military surplus stuff from Seattle Fabric...more on that in another post but initial results are good.)

Raft model inflated above the pattern used to produce it. Non diabetics will have to find something other than an insulin syring to use as a valve. 

Press'n Seal is a bit of a pain to work with but my first raft model shown in the photos on this page validated my calculations. I was able to come up with a design that uses four pieces of material and 8 seams to produce a nice tapered packraft-like shape with smooth circular bow and stern curves. 


Working design and pattern of the "Minima" packraft.

My sketches are still a bit rough but a larger version of the design I built would make a nice ultralight boat for alpine lakes and other flat water. If anyone wants to build it I can provide you with specifics. 

I would like a boat that is a bit more capable and includes a raised bow and enlarged stern. The raised bow can be achieved by curving the bow seams in the pattern a bit. One might be able to achieve a better stern shape by using elipses, or other conic sections. The stern section is, however, already at the limit of what can be cut out of one 58-60" wide piece of fabric so a longer stern will require the introduction of at least one more seam. I plan to split the stern piece on the center line of the boat which will allow a nice pointed stern and more efficient layout of the pattern on fabric.

This first design would require almost 6.5 yards of 58-60" fabric as the curved pieces do not fit together efficiently   
I'll do a write up on the next iteration of the design as I figure out the details.

My working name for this first, simple design is the "Minima"which is mathematician for the point at which a minimum is achieved and also sounds like a small fish. 

The  more capable design I am working on will be called the "Extrema" which is a term that can mean a point that achieves either a minimum or  a maximum and sounds like something that comes out of a stream.

The model is pretty leaky and I got quite red faced keeping it inflated for photos. 

This post is part of a series you can see all the posts under the Homemade Packraft Tag.


Tuesday, February 26, 2013

Raft Valves and Dreams of Homemade Packrafts

Jen ponders the idea of a raft. 

A friend recently got me intrigued with the idea of packrafting trips in shallow desert rivers. I can't justify the cost of an Alpaca or BayLee but would like something more durable and capable then a StuapiNRSFlytePacker or cheap pool toy. Something that could be dragged through shallow sections, beached on gravel bars, floated down the occasional class II+ rapid and paddled through mellow water with lots of sharp sticks.

On a long drive Jen and I became intrigued with the idea of making our own packrafts. The mathematician in me couldn't resist trying to identify the simplest design that could create a functional inflated shape out of a 2d material with minimal simple seams to make home production easy. The math  governing inflation of stretchable materials is still intriguingly unsettled. My mind has been keeping me awake as it searches for en elegant solution on par with the catenary curves used to keep the fabric in ultralight tarp shelters taut. 

Since not many people make their own packrafts (or Inflatable Kayaks, Matresses, Donuts etc.) it is difficult to find components like lightweight valves. I've managed to locate some valves that suit my needs and some other options that might be better if you are aiming for something more ultralight or mouth inflatable. I've enumerated them below. 

Heat sealable nylon "test pillows" with reusable AIRE Summit 2 valves.

White Water Valves

NRS and other white water specialty shops stock an assortment of two piece valves for white water rafts and kayaks. The stand outs in this category are the Leafield, Halkey Roberts and Aire Tributary Summit valves. These are all two piece valves with a threaded plunger assembly that screws through a hole in the fabric into a receptacle inside the tube as shown in this Video from NRS.


These valves are heavier then some of the other options but have a number of advantages:
  • Widely available in white water shops. 
  • Installable without glue.
  • Reusable for destructive prototype testing.
  • Proven design with a one way plunger valve for easy filling.
  • Availability of adaptors that can be used to make inflation bags, blow tubes etc.
Notably the Feathercraft Baylee packrafts appear  to use this sort of valve.

Partially Installed AIRE Summit 2 valve in a test pillow. 

For my material testing and prototyping I chose to purchase two Summit 2 Valve's for AIRE Tributary along with Adaptors and Vinyl tubbing to use them with a pump and eventually make an inflation bag and mouth tube that fit into the main valve. This valve appears to be one of the smaller and lighter whitewater valves available and is also one of the cheapest at $9/valve. It lacks a rubber gasket between the two sections and I've noticed some slow leaks against the rough surface of the thin fabric. For production I may use a double layer of fabric, a thin coat of Aquaseal or a gasket made from Silicone Rubber to ensure a good seal.

Home Made Mouth Inflation Tube 

As part of his excellent site on building inflatable and folding sea kayaks Tom Yost has instructions for making a flotation bag including a mouth inflation tube made from PVC pipe fittings, Vinyl tubing and a NRS Float Bag Valve.

Mr. Yost's site is a wealth of other information as well though he uses mostly vinyl materials for his kayaks. Packrafts tend to be made from urethane coated fabrics which allow for a more durable, flexible and lightweight construction and release fewer known toxins during production.  

Carmo Modular Valve System and Fittings

Image from carmo.dk
Danish manufacture Carmo makes a line of urethane glue/welding compatible flanges, fittings and valves. These appear to be the valves and elbow jointed blow tubes used by Alpaca for their well regarded pack rafts. The site states that small quantities are available in both PVC and Urethane compatible materials but they must be ordered and shipped from Denmark. Some of the items of interest for DIY projects include:

I may order some of these components to reduce weight once I have a prototype I am happy with but for now the reusability of the Aire valves is nice.

Pool toy/Cheap Raft/Boston Valves


I initially thought these would be one of cheapest and easiest options options and indeed the FlyWeight FlytePacker and NRS PackRaft use Boston style valve that are rumored to be  compatible with Exped Sleeping Mat Inflation Accessories.

They are unfortunately difficult to source unless you have an old raft to cannibalize. Many places offer replacement boston valves but these don't include the flange to glue into the raft.

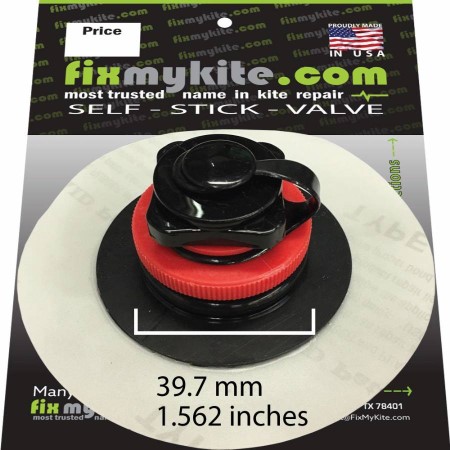
The only source I've found for the entire valve including flange is from suppliers of Power Kiting equipment where an inflatable bladder is used to give a kite rigidity and allow it to be launched from the water. FixMyKite.com has a selection of stick on valves and fittings available though it is unclear if the stick on portion could be cut off and if the flange could be used with urethane glue. These valves are also more expensive then the Aire valve I purchased from NRS but they do offer both boston and the simpler clear valves used on pool toys which might be nice for seats etc.

Next: The Fabric

The final design for my raft will be determined in part by the materials I can source. I'm happy with the Aire valves for now so the next step is to identify a usable fabric and determine what types of seams can be easily made airtight at home. As mentioned above most modern packrafts are made from urethane coated nylon which allows a durable, flexible and light weight construction   

My initial experimentation was done with some military surplus heat sealable packcloth and a sealing iron and rubber roller. This setup has proven extremely temperamental to work with. The fabric has a thin urethane coating on one side and is only sealable coated side to coated side, limiting the designs you can make.  This coating is also quite fragile and my test pillows frequently start leaking around the edge of seams where some combination of the heat of the iron and stress in the fabric would cause the coating to degrade.

Further, the seams aren't particularly strong and can easily be pealed apart by hand starting from one of the corners. The uncoated side of the fabric is also prone to wetting out through prolonged exposure to water.


In search of a better method and inspired by the heat welding used in the video above, I used a cheap digital heat gun and rubber roller to hot air weld some small samples of urethane coated "Traveler" and "Ballistics"cloth from Seattle Fabrics. This fabric is not sold as being "heat sealable" with an iron but using a method similar to the one in the video below I was able to produce a very robust seam.


Despite its small area this hot air welded seam can not be pulled apart by hand. It is also very resistant to peeling if one works to pull up one of the "lobes" left by the shaped edge of the sample piece.

Unfortunately this fabric is also only coated on one side and is even more air permeable than the heat sealable fabric. I think the ideal fabric for home tube construction with this method would be a nylon fabric in the 200-500 denier range with a thickish urethane coating on both sides. A thicker 700-1000 denier double coated fabric would be nice for the floor. Such fabric is available in large quantities from custom manufactures but I've been unable to find it in small quantities.

I'm also looking into adding my own coating using either liquid urethane raft sealant (see Dave Chenault's report on this) or a paint on coating used to waterproof nylon skin-on-frame sea kayaks or recoat whitewater rafts. These products could be applied either after construction or, if the result is hot air weldable, after cutting but prior to assembly.

PVC coated fabric is another option but it is heavier and releases more toxic fumes during heat welding.

If you've found a source for urethane coated fabric or another source for inflatable valves or glue in flanges let me know by posting in the comments below.

This post is part of a series you can see all the posts under the Homemade Packraft Tag.