Thursday, January 31, 2013

Sherpa Vajra Primaloft Puffy Pants

Going into the mountains in winter conditions requires warm, versatile clothing. 
I wanted to pay full retail for Sherpa Adventure Gear Vajra Pants. At $145 for a full side zip and 60 gram per square meter (gsm) of Primaloft One, the puffy pant they cost much less then many comparable pants. I scoured major retailers and specialty shops and couldn't find a pair. When they popped up at a steep discount on the the clymb I happily snapped up a pair in large. (I get a credit if you sign up for The Clymb through that link though I think they are out of these pants).


I plan to use these pants as "happy pants" or "belay pants." I'll put them on over all my other layers for added warmth (and happiness at stops or during the coldest part of the day when winter camping, ski touring, mountaineering or winter climbing.)  I look forward to being able to zip them on without removing my boots, crampons or skis if needed and may sleep in them to extend the comfort range of my sleeping bag on the coldest nights.


They should be a bit warmer then the similarly priced Outdoor Research Neoplume pants which use lower performing Primaloft eco insulation. Most other similar light synthetic insulated pants (Rab Photon, Mountain Hardware Compressor, Brooks Range Cirro, Montbell Thermawrap Tec, Eddie Bauer Fist Ascent Ignitor, Arcteryx Atom Lt and the discontinued Patagonia Micro Puff and forthcoming Patagonia Das Pant) cost between $170 and $200. Some of those pants like the Rab and Patagonia models use 100 gsm Primaloft One insulation making them warmer and heavier but the the 60 gsm insulation in the Vajra should be sufficient for use here in Montana and save a few ounces.

Worn over  thick Patagonia r1 long underwear bottoms and Rab Exodus Softshell pants. 


I wear large or 34" waste pants in most brands and the large Vajra fit well. They are a tiny bit tighter then I would like in the thighs but still just loose enough to wear over layers and close enough to wear beneath a loose fitting shell if needed. If you are between sizes or plan on wearing them over bulky layers I might size up.

Construction and design seems excellent, fully in line with what you from a more expensive and better known brand. They have minimal features keeping them light. They lack pockets or a drawstring but do have a wide elastic waste band, narrow elastic cuffs, zippered fly that unzips from the top or bottom and full, dual direction side zippers with velcro tabs at the top and snaps at the bottom. They are made with lightweight fabric throughout but the synthetic insulation should stay in even if they get worn or torn.

I'll report back on the long term of durability and performance of the pants after I've used them extensively.

Top of side zipper with velcro tab.


Bottom of side zipper with snap. 


Top of pants showing fly, elastic waste and Endless Knot symbol.


Unlike many technical garments, they are offered in both a men's and women's version though the women's appears even more difficult to find.

I have two pairs of waterproof pants made by Sherpa and bought at discount from steepandcheep. The Thamel 2.5 layer pants have proven to be a great light rain pant to throw in the pack and the Lithang stretch woven 3 layer pant is excellent minimal yet durable technical pant.

I am surprised that Sherpa has not had wider adoption and distribution. Their garments are excellent deals at retail price yet many seem to only be available in odd sizes from online discounters. We tried to buy their 200 gsm Raajen belay parkas a few years ago after realizing they were warmer and cheeper then DAS parkas but were unable to find them after checking several retailers and calling the manufacture directly. This coat seems to have been since been discontinued. Next year they will offer NeoShell and eVent garments which will be on my short list to check out if I can get my hands on them.


Tags included with the Vajra verify the use of high end Primaloft One insulation and describe the company, warranty and labor practices.
The company is also owned by and largely employes Nepalese Sherpas. Many manufacturers' claims should be viewed with skepticism but I had a conversation about Sherpa's labor practice with the late great Joe Puryear a few years ago while he was working on Sherpa's catalogs and he described excellent working conditions and told me that the factory even used unionized labor.

Sherpa is a company I'll continue to turn to for technical garments even if they don't have a roster of high profile sponsored athletes. Their simple construction and frequently discounted prices make them a particularly good choice for garments like insulated or rain pants where lightweight and packability are important.


Monday, January 28, 2013

Just Off the Beaten (Skin) Track

The slopes of granite creek.

Few things compare to the feeling of skiing untracked snow down into a valley you've only studied on a map. The joy of making turns in powder is accentuated by the certainty that no one has been there in a while and a vague sense of dread at the prospect of hiking back out. This feeling is what motivates me to work on Hillmap.

Unexpected powder.

We had low expectations for Sunday. There hadn't been a storm in weeks and the forecast and snotel showed a smattering of recent wet snow. We headed out anyways to one of the areas at Lolo Pass we hadn't explored yet, the G-Spot/Pleasure Bowl 2 miles on the Montana side of the pass. On the skin up our apprehension turned to dread as we skinned through an icy breakable crust. We considered turning back but figured we could ski down the road if conditions didn't improve. The snow got a bit better around 5800 feet and we met a few other paries lapping pleasant if tracked out powder on the upper slopes of a 6200 foot hill. 

Trailbreaking.

I was tempted to join them but, having studied maps, satellite photos and slope overlays on hillmap the night before, Jen had a better plan. We traversed East for a bit, quickly finding ourselves breaking trail through untracked powder and skied some pleasant low angle trees into the bowl Northwest of the 6200 foot hill. We then skinned up to point 6504 and skied a long, stellar run of untracked powder though open trees down a Northwest slope into the Granite Creek drainage. This run was perhaps our best of the season so far and the silence of the valley despite the nearby highway and snowmobile trials made the valley feel more remote then it was.

Stellar glades in the granite creek drainage.

Jen finds a line through some pillows.

We finished the day by skiing back the way we came and enjoyed another excellent run on untracked powder on the Northeast slopes of point 6504. It started to snow heavily as we skied off point 6200 limiting visibility but the crust below turned out  to be not as bad as feared. Our car was the last one in the parking lot and we were ecstatic to have pulled off an unexpected big day with plenty of untracked powder.

Starting the final descent back to the car.


Gpx track overlayed on Caltopo USGS maps with slope angle shading. green = 20-27°, yellow = 28-34°, red = 35-45° and blue > 46°.

Saturday, January 26, 2013

Ptarmigan in motley


I just can't get over ptarmigan feet.  Huge!  Makes sense as their feet function like snowshoes in their snowy mountain homes.  It is a rare treat to see one, and not just hear their warning boom emanating from the hillside.

Thursday, January 24, 2013

In celebration of Outdoor Retailer, the gear we wish they'd make again


I'm looking forward to drooling over all the new gear on show at the Outdoor Retailer this week. Featherweight ski boots?  Super-breathable yet waterproof shell material?  Yes, please!

However, as I see the new gear roll out, I am nostalgic for certain favorite pieces that are no longer made, and do not yet have a replacement.  Here is some of the gear we'd love to see again.

***

Ryan wears his Ascensionist on the ascent and descent

Ascensionist Softshell by Patagonia

The Ascensionist gives burly protection from weather, keeps me dry from precipitation and sweat, is lightweight, is supple and moves with me, doesn't rip when I wear it climbing, has just a tad of insulation so it feels like I am wearing more than a wind shirt - but not too much.  And the kicker, it is versatile and performs well for many sports and conditions.  I have had a good and enduring relationship with my Ascensionist for about three years.  It has joined me on climbing trips, backcountry ski trips, in-bound ski trips, backpacking trips, on winter bike commutes and on the walk to the grocery store.  The only time I don't throw it on my body or in my pack is during the middle of a blazing hot summer.  If I wash it, it looks new except for one cuff.  I'm like Goldilocks: when I try on different softshells they are either too thick, too lined, too thin, too boxy, too tight....I like my softshell just right and I hope the day when it wears out is very, very far away.

***

Ryan rocking the Pinks on Japanese Gardens at Index

Pink Anasazi climbing shoes by Five-ten

The Pinks are my second favorite climbing shoe of all time.  Stiff yet with a bit of sensitivity, they help me edge like no other...but also deliver performance on sloping foot placements.  The tension band across the heel pushes my toes forward, ensuring a precision fit in the toe box throughout the life of the shoe.  This feature even let me use Ryan's Pinks one day when I forgot to pack climbing shoes!  The synthetic uppers loosen up a bit but don't stretch.  The Stealth C4 rubber is super sticky, and durable enough.

Me showing off footwork in my Pinks


Five-Ten's replacements, the Anasazi Blancos and the Anasazi Verdes, split all of these features between two shoes but neither quite covers them all with the same excellence.  I have a reserve pair of Pinks for hard projects, keeping the edges in good shape.

***

Thatchers drying in the sun during a trip through the Enchantments to climb Prusik Peak in Spring

Thatchers by Patagonia

The Thatchers pamper my feet.  They are a lightweight, minimalist shoe with a cork footbed and a shank in the sole.  No matter how many miles, or how heavy my pack, my feet never felt a fraction as beat up as they would in hiking boots or other approach shoes.  They scramble and climb almost as well as my Five-ten Guide Tennies, but are lighter and more compact for an easier carry on my climbing harness for those long and scrambly walk-offs. What I miss most is how my feet felt at the end of a very long day.

***

When two Das Parkas are not enough...

Sherpa Raajen jacket, MEC Tango and other super puffy synthetic jackets

It seems that we have entered the age of multiple puffy layers instead of one very thick and warm jacket.  Multiple layers have their place, and I love my light Nano puff.  However, when it is cold, there is no substitute for a very warm layer you can throw on to get warm fast and as a backup to be safe in case of injury far from the trailhead. Two of the thickest Primaloft One jackets made, the Sherpa Raajen and the MEC Tango, were recently discontinued along with other super puffy jackets from many top brands.  Casualties of the new layering trend, and not replaced in other companies' lineups.

***


Hope for the future

Every now and again great gear gets a second chance, and receives another production run.   Sometimes the original company grants the gear a second life, and sometimes another company picks it up.  Aliens are my favorite gear fairy tale at the moment, and now two companies, Totem and Fixe, are making runs with the Colorado Custom Hardware pattern for Alien cams climbing gear.  Yes!  We picked up an essential second green Alien cam when it came on the market and scratched it up last season.  Here's hoping that other worthy gear is made again.

Tuesday, January 22, 2013

Lolo Powder and Hoar


We spent the last two days up at Lolo Pass chasing remnants of the last storm through clearings and trees. We found enjoyable soft snow in sheltered spots, sun effect on Southern slopes and quarter sized surface hoar frost crystals in clearings along the ridges up high.


Friday, January 18, 2013

Embed an interactive topo map in your blog

Engage your blog & website readers by giving them the opportunity to interact with your map directly on your site.  

You can play with the map by clicking and dragging to see more terrain than fits in the current window.  If you want more interaction with the map you can click the "View in Hillmap" link to see the map in hillmap.com, see more detail, edit the route, and view the route on different map layers (satellite, USGS, etc.)


How to embed the map

If you program HTML, you can grab the iframe of your map when you click the "Link" button in hillmap.com.  The site generates the code for you.

If, like me, you do not program HTML, you can still embed a map in your site without too much hassle.  The directions below are for you, and please send us an email if you get stuck along the way.


Step 1: Create your map

Visit hillmap.com and customize your map. You can zoom in on your area of choice, plot a route, or upload your gpx tracks.  

Step 2: Prepare your blog

Most blogs have both a graphic user interface (GUI) and an HTML interface.  To embed the map, you will need to copy and paste code into the HTML interface.


Switch to the HTML view of your blog.  Now, my level of HTML programming is such that if I break something in the code, I may or may not be able to fix it by myself.  When I play around in the HTML I protect myself against irreparable breakage by first copying the code, and pasting it somewhere that won't add extra code, a good place to paste it is in a basic text editor. DO NOT copy and paste your code into a Word Doc, because Word will add extra code to your text.  Messy.

Now that the orinal code is somewhere safe, if I break the HTML code I can always replace the broken stuff with the original.  All that is lost will be a little time.


Step 3: Decide where in your blog to put the map

If your blog post is a blank sheet of paper, inserting the map code is easy, just toggle to the HTML view and paste the code (which we will generate in the next step) on the page.  Toggle back to the Graphic User Interface (Blogger calls this view "Compose") to see your map.  Done! Then just treat the map like a photo or other graphic, and work around it.

If, like me, you write your blog post first and then insert images in the appropriate places, you will need to locate where you want to put it in the html.  The HTML displays all of your text, so it's not too hard. I often mark my place with text in the graphic user interface that I can then see in the HTML view.


Step 4: Generate the code

Navigate to your map in hillmap.  Click on the link button at the top of the map screen, or click on the Toosl Tab and select "Link To."

A screen will pop up with two different link options, one is a url for your map.  The other is the iframe, which is what you need to embed the map.  Copy the iframe code (highlighted in blue in the image below.)


Step 5: Insert your map code into the blog

Toggle to the HTML view in your blog.  Paste the iframe code in the location you previously identified.


Now toggle back to the graphic user interface, and take a look at your map!

Remove the map from your blog post

If you need to delete the map, you will need to erase the code in the HTML view, you cannot delete it from the graphic user interface.


Zoom makes a difference

The map will show up in your blog at the same zoom that is displayed in hillmap when you generate the code.  If you want to show the entirety of a long trail in the blog, make sure to zoom out.  If you want to show terrain detail, zoom in before generating the code.
Remember, your readers can move the map around in your blog to see more of the terrain in your blog site, or visit hillmap.com to use different tools to explore your map in greater detail.

Map zoomed out


Map zoomed in

Wednesday, January 16, 2013

Frosted


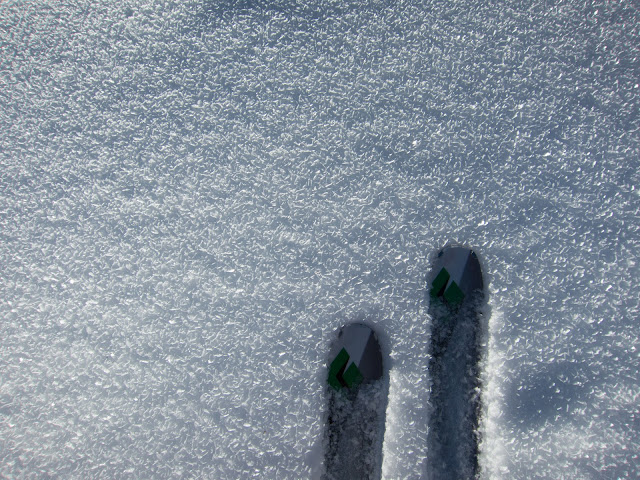
Our recent cold, dry weather produced an astounding frosted landscape.  Up high each and every needle was individually coated....the same was true for beard hairs.


Tuesday, January 15, 2013

Planning a trip with skiers and snowshoers


Our good friends from Seattle came to visit last weekend looking for a vacation in the snow.  We raided the gear closet and found two pairs of MSR snowshoes and skis that fit us but not our friends.  It was a quick decision for us to plan a mixed trip with two on snowshoes and two on skis.  We had a blast, froze some fingers and learned some things about mixed trips.

Rule of thumb: Snowshoers are faster going up, skiers are faster going down

Skiing and snowshoeing each have their strengths and weaknesses.  Choosing a trip that will be enjoyable for everyone is not too tricky when you understand the kinds of terrain that are most fun for both.

Snowshoes

We have two pairs of MSR snowshoes that are excellent for blasting uphill and navigating tight trees, narrow turns and exposed obstacles like rocks and logs.  Given a similar level of fitness and experience, someone on MSR snowshoes (or other snowshoes with a good crampon and not too wide a base) will be much faster going uphill. They are also great for diverse snow conditions from powder to hard, icy snow.  This kind of snowshoe will float on deep powder, but will sink farther than powder skis, making it more difficult and slower going in deep snow.  Our friends called these snowshoes "a toolbox for your feet" because the crampon plus base give your feet more tools for dealing with different conditions than boots.  However, snowshoes are slow downhill - about the same speed as hiking, depending on snow conditions.


Skis

Skis are designed to go downhill.  Unless you are on a classic cross country setup without metal edges, a beautiful, snowy slope is an invitation to make turns downhill.  In decent conditions, skis are much faster downhill and untracked powder won't slow them (much).  Depending on experience and conditions, it can take half the time or less to go downhill as it did to go up.

Skis, even with skins or scales, can slip and slide ascending steep or icy slopes.  Setting a track with switchbacks makes it much easier to go uphill, but adds length to the route.  Snowshoes can go straight up.  Skis also make it more difficult to cross over fallen logs in the trail and other obstacles.  

Snowshoers will wait for skiers on the way up, while skiers will wait for snowshoers on the way down.

Choosing or setting a trail

The difference between skis and snowshoes is most prominent when the terrain gets steep.  If you don't want to wait much, choose a trail without much change in elevation.  

The views up Blodgett Canyon Trail inspired us to keep going longer than planned

Our first trip out on Saturday was up the Blodgett Canyon trail.  The trail is a rolling route along a stream with unbeatable views.  Our friends paused and cheered (or teased) us as we grappled over icy rocks and lumps in the trail on the way up.  We paused momentarily on the way back to the car at the bottom of small hills while waiting for them.  We did use our crosscountry touring setup for this trip because they are more fun on flatter terrain than our alpine touring gear.

Sunday we went on the Lolo Pass snowshoeing loop trail.  The trail cut up through the trees and back down open, powdery slopes.  The four of us stayed together to the top of the ridge, and then split up on the way down.  Our friends took the trail back to the lodge, while Ryan and I skied a couple laps, cutting out part of the loop.  We all had fun and met back at the lodge.

Ideal ski conditions at Lolo Pass on Sunday


Splitting up worked because we had an easy-to-locate meeting spot and none of us had to wait too long in the cold. We actually got back to the lodge within five minutes of each other.

Another thing to consider is that skis and snowshoes create different kinds of tracks.  Skis need a smooth track to function best.  Snowshoes fare well with most broken trails.  If snowshoes use an established skin track (uphill ski trail) they can destroy the smooth track.  If possible, snowshoes should not use established skin tracks.  However, if you're out with a mixed party and are breaking a fresh trail, all parties can benefit from switching up who breaks trail.

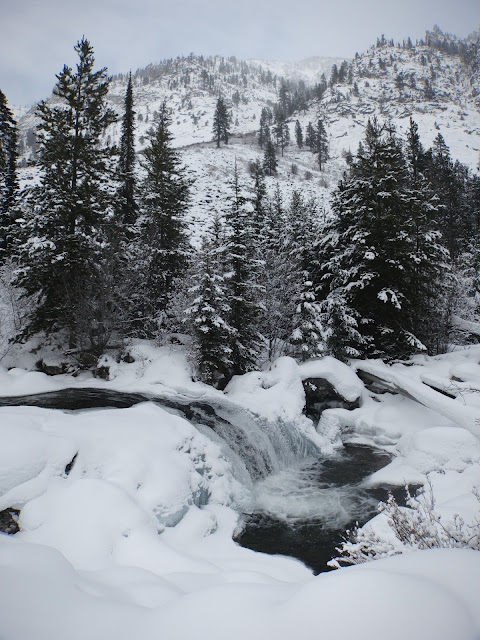
Waterfall along Blodgett Canyon Trail

Yes, I would go again

Taking a mixed trip of skis and snowshoes proved to be less complicated than I originally thought, and I would certainly take a trip like this again.  A large part of our success was due to everyone being comfortable and happy on their chosen mode of transportation.

Wednesday, January 9, 2013

Fire Maple FMS-118 Sputters in the Cold vs MSR Windpro II


For a fix for the issue described here see this followup post. 

The Fire Maple 

On first look the Fire Maple Fms-118 Volcano is a compelling stove for cold weather camping and snow melting but my testing has revealed that it is affected by a nasty sputter that keeps it from performing as well as the heavier and more expensive MSR Windpro II.

Designed and built by Fire Maple, a Chinese manufacturer that builds stoves for several major makers, it can be found on ebay or amazon in the US. It offers a tiny packed size and 2800W / 9554 BTU output. It is fairly light and has also been moded to use the titanium legs from another Fire Maple stove, the fms-117T (also marketed as the Olicamp Xcelerator ) to achieve impressive low weight (see this thread on http://bushwalk.com/ for example).

Most important it has an remote canister design and a pre heat tube which should theoretically allow it to work in conditions colder than the boiling point of isobutane (10.94°F /-11.7°C) with an isobutane/propane canister inverted to feed liquid fuel into the stove where it will be vaporized by the preheater. Steve House mentions this as one of the main advantages of the older MSR Windpro in his video discussing gear he used on Nanga Parbat.


Stoves with inverted isobutane canisters fill a niche for cold weather camping

White gas stoves are the gold standard for cold weather use but the hassle of priming them and the necessity of frequent field maintenance and spilled fuel makes them dangerous for use in or near a tent and annoyingly slow for use at quick stops.

For me a Jetboil stove stowed attached to a canister in its own heat exchanger pot offers the ultimate in convenience and efficiency. Unfortunately Jetboil (and other upright canister stove) performance degrades severely at low temperatures as more of the isobutane in the canister becomes liquid. The new Sol models improve things a bit with a pressure regulator in the burner that supposedly offers good performance down to 20°F. There are also various methods to keep the canister warm: body heat, a bit of copper wire wrapped around the canister with the end placed in the flame or a water bath.  However, with these methods you are always fighting the cooling effects of expanding gas. We spent a chilly evening (about 0°F) nursing our Jetboil into melting a few litters of snow and haven't trusted it in cold conditions since.

A stove like the Fire Maple packed with a small MSR canister inside a medium sized Primus heat exchanger pot has the potential to approach the safety, ease of use and efficiency of the Jetboil system while performing well in lower temperatures.

FMS-118 packed in 1.7 L primus heat exchanger pot with attached canister and room for MSR wind screen and reflector base.

Unfortunately, early testing reveals a fatal flaw in the form of a nasty sputter that appears a few seconds after the canister is inverted.

FMS-118 sputter with inverted canister. 

To determine how prevalent this sputter would be in the field, I performed numerous tests on our porch while making coffee and tea on a daily basis over the last couple of weeks. Though I will report only qualitative results, I took a scientific approach and attempted to examine and control for factors that could effect stove performance across a number of conditions simulating the worst of what is encountered in the field.

Different testing conditions

  • Ambient temperatures ranging from 10-27°F 
  • Varied temps of the fuel canisters: canisters chilled overnight in a 2°F freezer, at room temperature and left out over a ~10°F night
  • Used with both new canisters and canisters in various states of depletion
  • Snow Peak, MSR and Jetboil brand fuels
  • I attempted to ensure that the pre heat tube was adequately heated by letting the stove run with the canister upright for various lengths of time before inverting and using a wind screen to reflect heat inwards onto the tube

Observations

Even with the stove well preheated and fuel rate turned almost all the way down as the canister was inverted, the sputter always appeared after a brief time with the canister inverted in all conditions and is often accompanied by a smell of gas. I believe that the Fire Maple preheat tube is insufficient to warm the volume of liquid fuel it contains during use.

Sputter persists even with excessive pre heating & use of a windscreen. 


Comparison with other stoves

For comparison purposes I tested an MSR Windpro II which has a much longer preheat tube and Jetboil Sol (actually a replacement burner bought as a spare part used with an old cup) in similar conditions. I'll do full write ups of how those stoves perform in the cold once I have done more tests, but to summarize early findings the Jetboil performed anemically with a cold canister despite its internal pressure regulator.

The MSR Windpro II reliably handled everything I threw at it. I even tried lighting it with a 2°F canister already inverted giving no chance for the stove to preheat. It fired right up and within less than a minute was producing the classic MSR rocket-like roar and boiling water faster then our (underpowered) propane kitchen range. Despite not packing quite as small or weighing quite as little as the Fire Maple it will be the stove we take on most winter trips.

Even with the sputter the Fire Maple still boils water fairly quickly with an inverted canister in the cold. My main worry would be the risk of it going out or releasing fuel in liquid or gas form.  It may earn a spot in our packs during the shoulder season when we don't expect to need to invert the canister. I may also look into methods to make it perform better by reflecting more heat onto the preheat tube and reducing its internal volume with a bit of wire as discussed on the thread on bushwalk.com.


Monday, January 7, 2013

Winter Conditions at Gash Point

Basking in the wind at the Saddle near Gash Point

It was full-on January this weekend at Gash Point.

Warmer temps at the trailhead and a glimpse of blue sky lulled us into thinking that it was going to be a balmy day.  As we broke out of the forest and onto the ridge leading to the saddle below Gash Point, the wind picked up and hurled snow in our faces.  Well, we've been searching for face shots!


Click on the "View in Hillmap" link above to see our route in hillmap.com, view the USGS topo map of the path, print a map and upload the gpx track to your gps.


There is a well-established skin track from the lower parking area at the hair pin turn just above 4700'.  The track is a bit of a tobogan run at the moment: slick and a bit icy in places.  It follows a good line up to the ridge, but has been mostly erased by the wind once you break out of the taller trees.


Snow conditions are variable.  I had to dig deep and remember how to ski on crusty snow, so far this year we've been spoiled by the gorgeous powder on most slopes.  We did find some patches of great snow, although I'll wait to head up to Gash again until more snow falls.

Definitely glad to be on our fat skis!  My Black Diamond Starlets handled the crust well, especially while turning on crust through the trees.  Ryan was singing the praise of his Black Diamond Justice skis throughout the day.


All in all, it was a great day and I look forward to skiing Gash again - although next time I hope for some summit views.